Pages

Showing posts with label Filofax. Show all posts

Sunday, June 14, 2015

The A6 Mulberry that almost didn't happen

Hi everyone!

First of all, my apologies for being MIA. Family and life had to take priority and the blog suffered because of it, but I hope to get back on the saddle and continue to post more. Thanks for still being around!

This post is about a planner I never thought I would ever get, much less LOVE. I have always been intrigued by the Mulberry planners, but as someone who has used Filofaxes for many many years, it was daunting to take on a size completely unknown to me. One, because inserts and accessories for an A6 are not as readily available. And two, because I didn't know how I would get along with the size. 


However, I started using a Hobonichi in A6 in late 2014, and I enjoyed that size. Shortly after that, someone offered this beauty for me to buy. I refused at first, but couldn't get it out of my mind. She was just so pretty. The pink and the postman's lock were right up my alley. So I relented, and bought her, and I've never looked back since. 


Above is how I've set up the pockets with stickies, washi, and paper clips. The dashboard is a Target paper bag I repurposed. And below is what are in all those pockets.


The calendar below is from Mswenduhplans. I love it!


I made similar tabs in my personal sized planners that I made here. They're made from plastic folders, cut to size, and with tabs, and I labeled them with custom Erin Condren stickers. I love that they look neat and clean, but add a pastel palette, my fave. I have five tabbed sections: Diary, Notes, To Do, Blog and Menu.


I researched inserts and calendar layouts even before I got her because I knew I was going to print, cut and punch 99% of my inserts. I settled on a monthly insert from homemadekraft on etsy. I still use my monthly as a mini journal, a habit I've continued to do since 2014.


For my weekly layout, I asked Kelly Bangs Creative, also on Etsy, to resize some custom inserts she made for me into A6. If you follow me on Instagram, you know how much I love her inserts. And because these weeklies are undated, I can use them forever, and switch around at whim without feeling guilty about wasting paper. I just love how she designed her inserts with bows and pastels!


The Notes section is for jotting down any random thoughts, and for items that have no specific section yet. Sticky notes abound here so I can write something down and stick it where it needs to go. 


And the To Do section is for long-term items, or items that have no specific time limit. 


My menu section is one of my most-used. They're also from homemadekraft on Etsy. 


I always keep lists of dishes we normally eat. It just makes it easy for me to plan for the week ahead.


After the tabbed sections are what used to be my color-coded section. It functions exactly the same way, I just haven't gotten around to making the tabs yet. The divider is a Project Life card from the Gold Foil collection. 


The last sections are accessories, sticky storage, etc. The card section was a gift from a sweet lady, Alessa, who knew I couldn't find any - thanks so much! The zipped pocket is a notebook cover from Daiso, and the pen loop/envelope hack was DIY'ed. 


Yes, that's my dog in the photo, lol. 

My only niggle about the Mulberry - the teeny tiniest of pen loops. Why, oh why, would Mulberry put such tiny pen loops in their planners?!? This is one of only two pens I have that fits. It's a Uni Style Fit single. 


I've been in this planner since I got it on April 1st! Maybe the longest time I've ever spent in just one planner. I love her so much, I got her a baby sister that I use as a wallet. 


And I don't feel a need to move out. However, I have a ton of personals that I need to use so I'll be out of this starting in July. And I have a very special and amazing planner I'm planning to use then.

In the meantime, I will enjoy the time I'm in this!

I'm happy to be blogging again. I hope you enjoyed this post, and I hope to continue to write more!

Till next time!


Friday, October 17, 2014

Craft Studio and Desk Makeover

Hi everyone!

I recently redid my craft studio to gain some additional table room because I couldn't spread out enough. I also didn't want to spend a lot of money and wanted to use what I had.

I apologize In advance for the less than stellar lighting. I don't get great natural light in these areas. Ironically enough!

Here's a Before shot. 


And here's an After.

Simple furniture helped me gain the entire wall where a linen armoire was. 


Plenty of room now. I can even transport my stationery supplies here if I want to journal on the table. I used to do that on my bed. 


Most of the wall storage is the same. I just added more washi tape storage. I prefer them stored this way because they hardly take up any room. 


Super simple shelving was put up and it allowed me to clear a lot of things on the counter but they were all still easily accessible. 


I took out the boxes of planners from their hiding place.


This nook holds office supplies and files in the rolling cabinet. The frame was one that belonged to my grandparents, repurposed and strung with wire and clips. 

The drawer system holds handmade cards and other bits and pieces, and the document holder on the left was from my mom. It holds card stock, envelopes, etc. 


Dollars spent: about $20

A few weeks later, I was inspired to makeover my vanity as well. It needed some sprucing up. The bigger motivation though was that I wanted a pretty desk but as you can see from my craft studio, there's no room for a desk. 

Here's a Before shot. Functional, but not really very pretty, and looking a little but cluttered. 


Here's the After. A little bit more streamlined, and functions better as a desk. It also doesn't take away from its function as a vanity. The makeup on the counters is just stored elsewhere but still within reach. 


FYI, $0 spent because I already had everything I used.

A close up of the left side. easily transportable planner supplies in the dotted case, and self inking stamps in the floral cases. 


Pens, etc., separated by function in these cups. I've had these forever and use them everywhere. 


I love it for writing, planning, journaling, without the makeup getting in the way and distracting me. The brushes had to stay where they were though. 


This is what the drawers look like now. 


And this 3-drawer system that used to be nail products storage now holds makeup instead.


And that's it, my two makeovers. The desk was weeks in the making because I had to work out in my head first what I wanted to do. Once I figured it out though, it just took about an hour

Now I need to find storage for my nail polish. 

Thanks for visiting!


Thursday, October 9, 2014

Using a Midori Traveler's Notebook as a Planner, Again!

Hi everyone!

As soon as I post an updated planner setup, I get an urge to switch planners. I'm now using a Fauxdori as my main planner. 


If you'll remember, I used one exactly a year ago. I got it for my birthday and I was determined to use it as wallet and planner. Well, that didn't work out so well. It got too thick for me. Although I love chunky planners in photos of other people's, I find it hard to carry one around when it gets too chunky. It also makes it difficult for me to grasp in one hand. I hope that wasn't confusing. Lol. 

I did use it as a planner for two months but missed the rings on my Filofax so I switched back to rings again. 

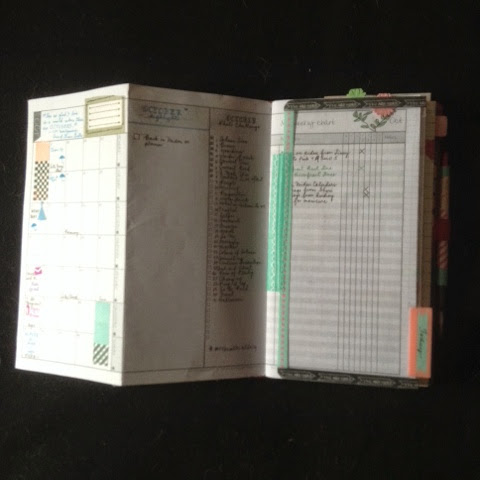
This time, I only have two notebooks in here. It's still a little chunky because of all my doo-dads in there, but it's much less chunky than what I had before. I have the DIyfish inserts for October and a brain dump/reference notebook. 

Here's a short flip-through of my setup. If you have any questions, please let me know in the comments. 


I know I'll switch back to rings again someday, especially because I have wonderful inserts for 2015. I'll show you those inserts in my next post. But for now I'm enjoying this!

Thanks for visiting everyone!


Friday, September 12, 2014

Updated Planner Set Up

Hi everyone!


I want to start by saying there is no perfect planner set up. I myself change things around A LOT. Whatever works for you is the perfect set up for you. I'm showing how mine is at the moment but things change around so much - I add, remove, and switch things around at will.  However, the main components will always remain the same.

I also find setup posts daunting because there's just so much to write about and photos sometimes don't do them justice. But I'll give it a shot anyway. (:

First off, here are the contents of the pockets. This planner has so many pockets that I use to carry whatever supplies I need. My planner is quite self-sufficient as you'll see later. 


I've been loving switching around my dashboard a lot lately. At the moment, it's this glitter washi'ed flyleaf with a blinged key that was a gift. 

Immediately following that is my sticky note section that I've always had. It just makes it easy to flip to a page and jot down a quick note to give out to someone, or file properly at a later date. This thing moves around a lot in the planner depending on my mood. 


I also have a Filofax brand Multi Purpose Card holder to hold stickers and the occasional cute Project Life card. 


Next is the Diary. This is the heart of my planner. I prefer it to be the first thing in my planner but sometimes have it in the middle too. Right now, it's right after the sticky note station. I have a flyleaf that's cut down to about 1/4 inches wider, and edged with washi tape, to take me to straight to the yearly spread. 


Month View

There are two monthly charts included in the Diyfish pack. I use the gridded monthly chart for bills, vet visits, and other payments I need to make. 


The monthly calendar view is used as a mini journal. I refer to this spread to create a monthly journaling page in my Midori. This is the first time I'm using her inserts. 

Week and Daily View

Currently, I'm using the diyfish V2 Style 3 for the weeklies with day-on-one-page for my diary. I'm loving it so far. I enjoy the extra room I have to write just about anything I want. I also use it as a journal for the day. 


After the Diary are my tabbed sections. I've written about this often enough in earlier posts. Just search 'setup' to find them. 


Finally, my Color-Coded section. I love this section because I can find things easily when I need something. It's similar to the A to Z 'filing cabinet' concept but with colored tabs instead. My categories are Me, Home, Family (including the dog), Financial, Crafts and Media. 


The very back has a plastic envelope for loose pieces of paper and a laminated page lifter. 


I love this Kate Spade binder because the pockets are so functional. I slipped a flyleaf with a pen loop that can hold a fat pen because I think the pen loop it comes with is too tight. 

And there it is, my current setup. It's not much different from what I used to have but I've been enjoying prettying it up. 

If you have any questions, please let me know in the comments. Thanks for visiting!